Cutting hosting costs by 99% with static websites on Azure
Microsoft Azure now offers static website hosting through Azure Storage and it will save you a ton of money. The static websites feature, currently in preview, was launched on June 28, 2018.
Hosting a website (with a server) can be done for free on Azure, but adding a custom domain requires the “Shared” tier which starts at $9.67 USD/month. Adding SSL requires the “Basic” tier which starts at $55.80 USD/month, plus the cost of the SSL certificate. However the same website hosted through static websites with a custom domain and SSL will cost roughly $0.20 USD/month.

Static websites hosting is not for everyone. It is a serverless solution that requires static HTML and is ideal for static or JavaScript heavy websites and applications.
Create Azure Storage
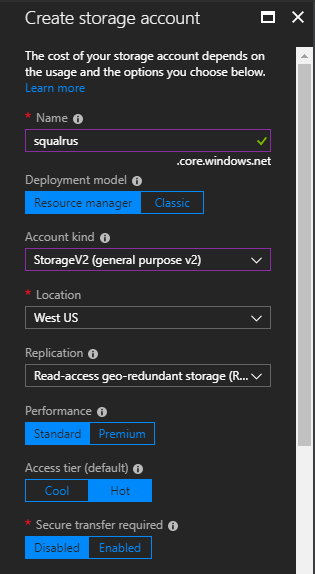
To start, create a new Azure storage account, the only requirement being StorageV2 to leverage the static website feature.
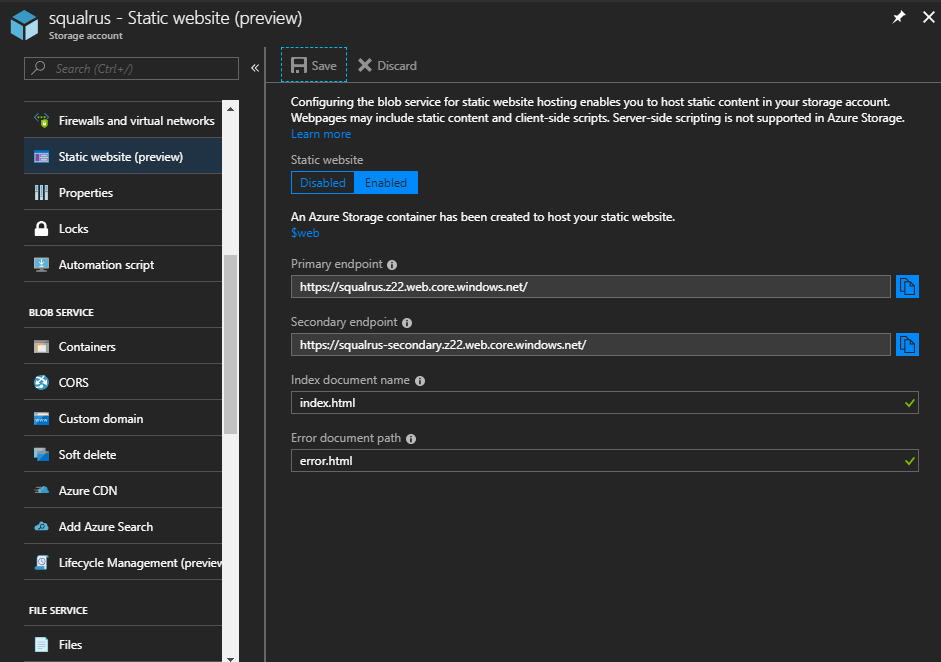
Enable the static website feature through the menu. Doing so will create a $web container where the site files will live aliased to the newly generated endpoint URL. Take note of the endpoint URL — it will be used as the origin URL for the CDN. The “Index document name” will be the file served up in each folder. So the root will look for index.html and /about/ will look for /about/index.html. The “Error document path” specifies where the error page lives for serving up a custom 404 page.
Create a CDN profile
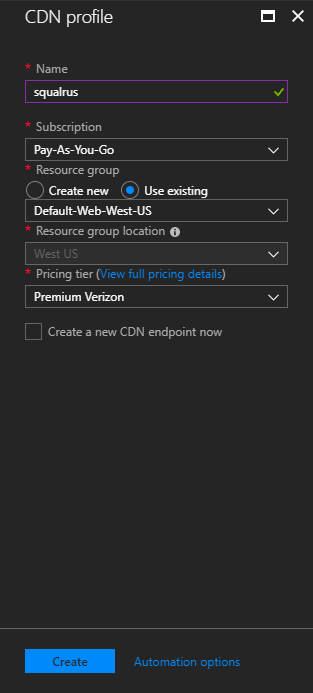
Create a CDN profile using Premium Verizon (this will allow for some advanced features in the CDN portal).
Create a CDN endpoint
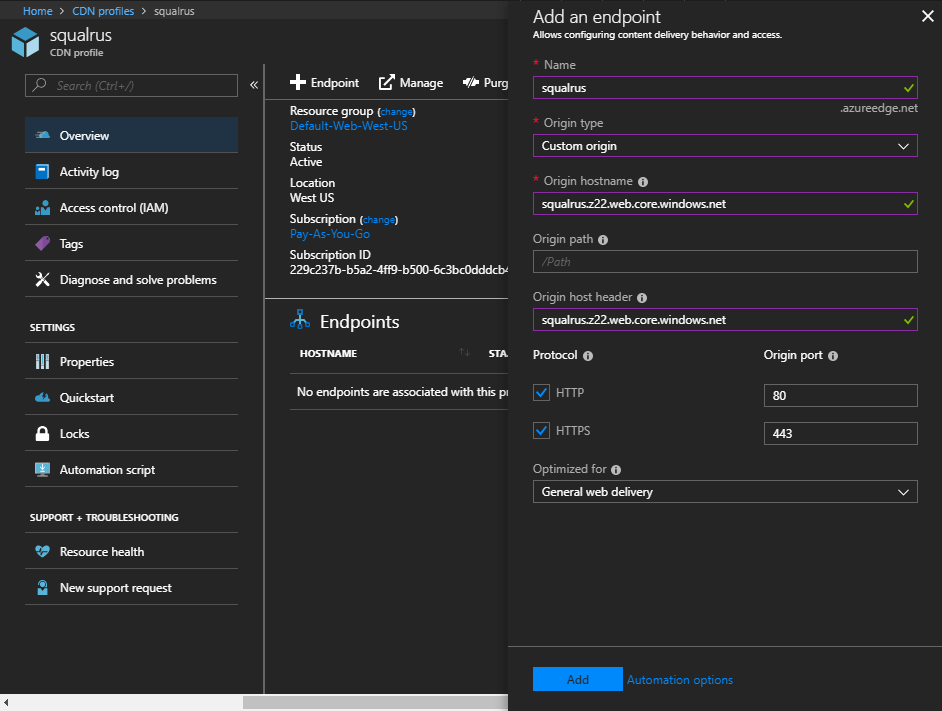
Add a new endpoint to the CDN profile. Configure “Origin type” to Custom origin (selecting Storage will not show the static website endpoint). Enter the static website endpoint as the “Origin hostname”.
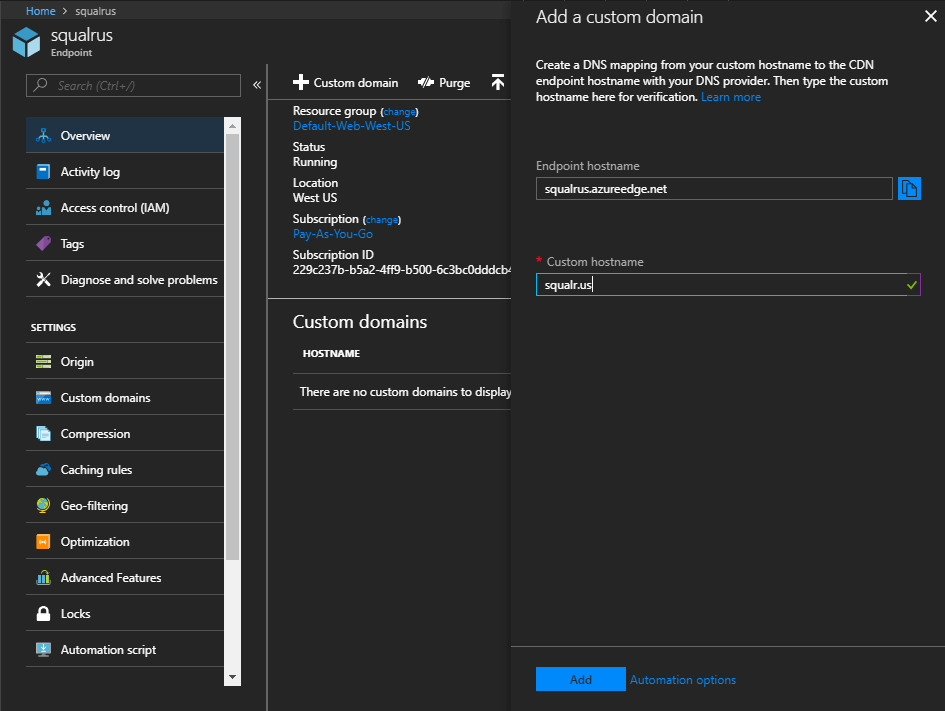
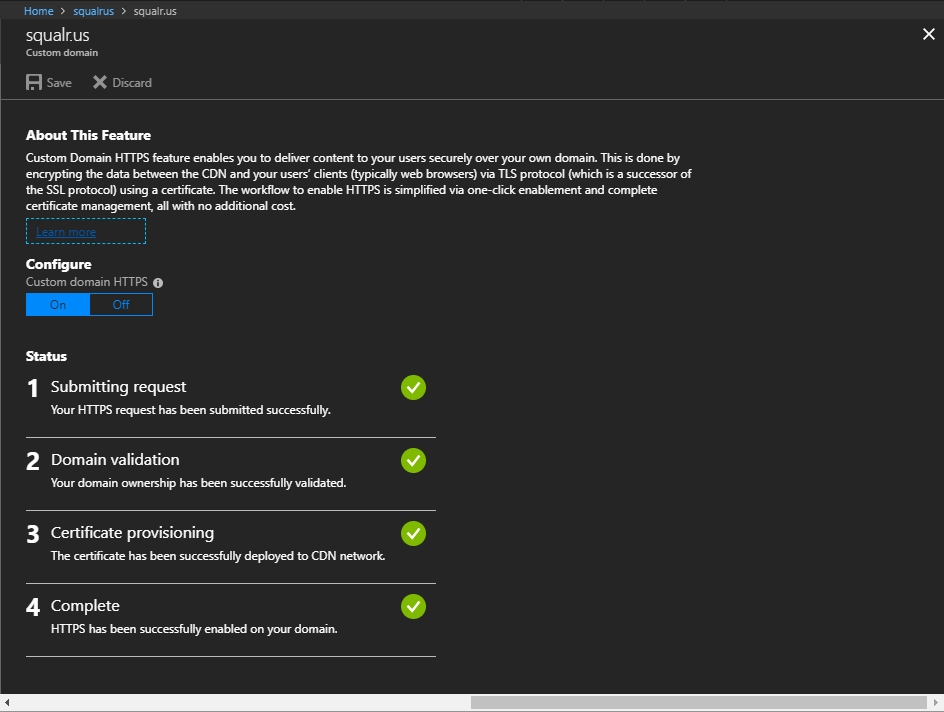
After updating the DNS mapping (typically done through a domain registrar portal), add the custom domain to the CDN endpoint. Select the custom domain and enable HTTPS. This process can take up to several hours to complete.
NOTE: to enforce www, add a CNAME Record for both naked domain and www subdomain. Add both of these as custom domains for the CDN endpoint.
Configure CDN
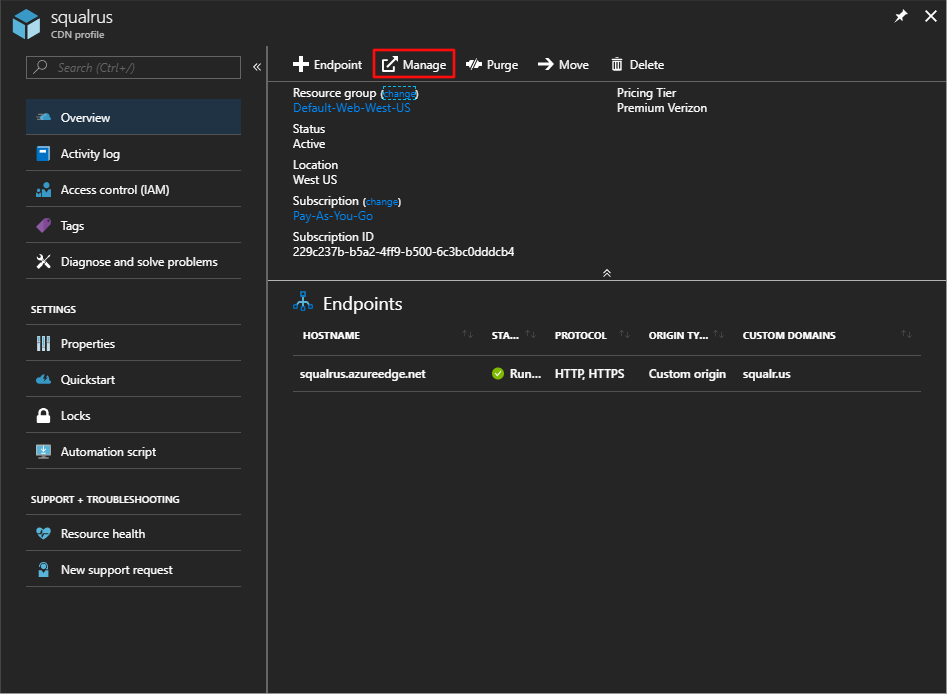
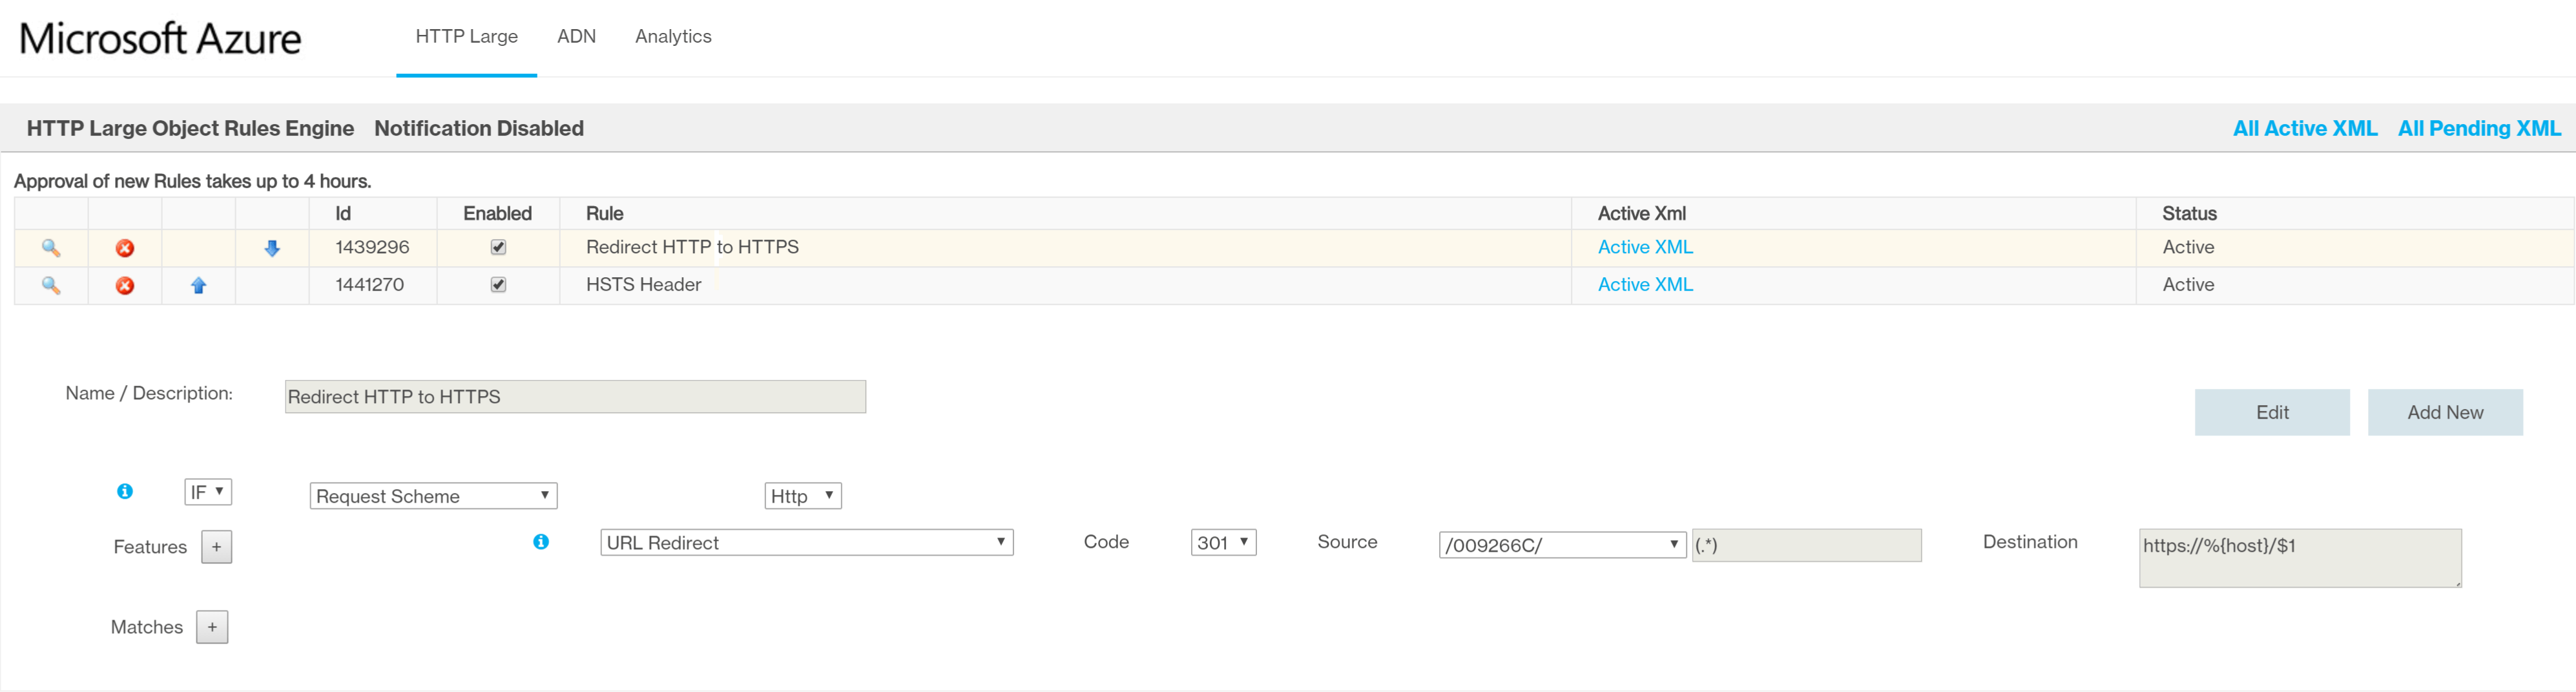
Finally, configure the CDN to force HTTPS. This is done by clicking Mange from the CDN profile, which opens the Verizon portal and allows for management of rules through the Rules Engine.
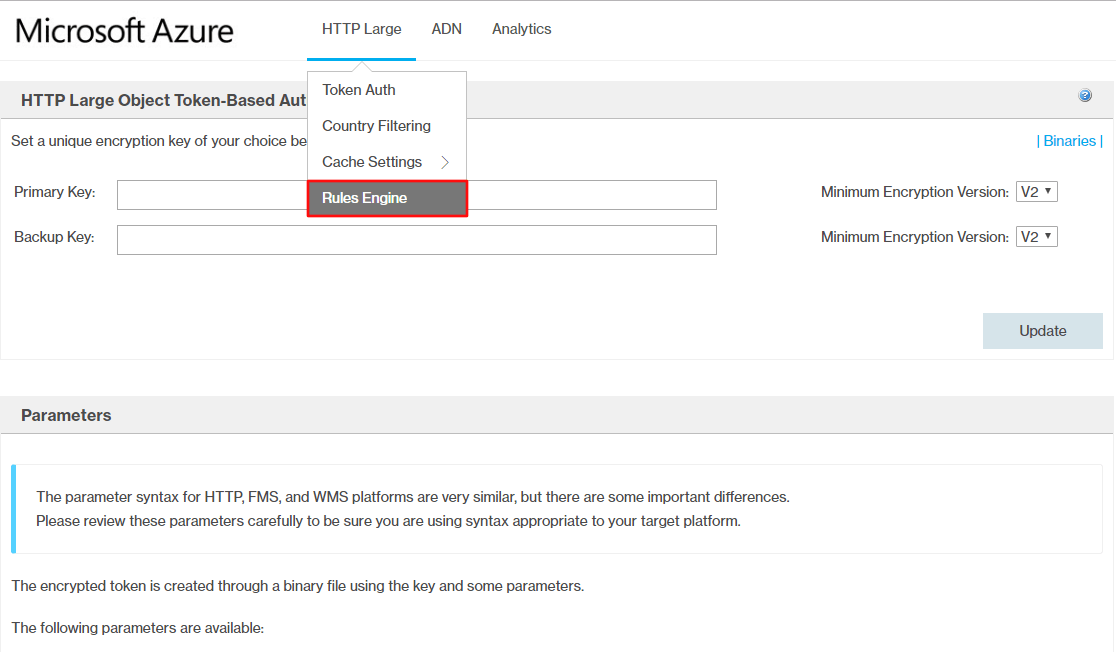
To best support HTTPS, add two rules: redirect to HTTPS and enforce HTTPS with a header. To redirect to HTTPS add new a rule through the portal, the example is named “Redirect HTTP to HTTPS” where Request Scheme is “Http”. Add a feature that is a “301 URL Redirect” with source value (.*) and destination https://%{host}/$1.
NOTE: the source dropdown must be the** multi-segment** value to be enabled for the custom domain endpoint.
To enforce HTTPS add another rule through the portal, the example is named “HSTS Header” where “Always”. Add feature to “Modify Client Response Header” to append “Strict-Transport-Security” with a value of max-age=31536000.
NOTE: Updating rules can take up to several hours to propagate.
NOTE: To enforce www subdomain through the portal, add another rule called “Redirect to www”. Set the condition to check for “Edge Cname” of the non-www CNAME. Add a feature of “301 URL Redirect” with source value
(.*)and set the destination to the www subdomain (likehttps://www.squalr.us/$1).

Depending on the current infrastructure, there are most likely ways to convert existing logic and dynamic sites to static files. For example, a Grunt task like grunt-fep-ejs can generate static HTML from EJS templates and JSON data. Using tools like Azure Storage Explorer the static files can easily be uploaded to the $web storage container. Deploying a static website is easy and the savings can be huge.
How much are you paying today? How much can you save converting to a static website?
Checkout my followup with advanced production settings for static websites!